


Hints,Tips and Troubleshooting

Here’s a few articles, hints and tips that
we think might be of help:
Assembling hydraulic equipment;
■ Most important – cleanliness. Contamination is the
reason for many hydraulic problems;
■ All
openings in the reservoir should be sealed after
cleaning;
■ No grinding or welding operations
should be done in the area where hydraulic
components and systems are being installed;
■
All hydraulic cylinder, hydraulic valve, hydraulic
pump and hydraulic hose connections should be sealed
and/or capped until just prior to use;
■
Mineral spirits should be kept in safety containers;
■ Air hoses can be used to clean hydraulic
fittings and other hydraulic system components.
However, the air supply must be filtered and dry to
prevent contamination of the parts;
■ Examine
pipe fittings and hose assemblies prior to use to
ensure that burrs, dirt and/or scale are not
present;
■ All pipe and tubing ends should be
reamed to prevent restriction and turbulent flow
■ Never use Teflon tape on straight thread
connections;
■ When installing hydraulic
pumps or hydraulic motors, always align coupling
halves as closely as possibly, within 0.007 inch;
■ When using flexible hydraulic couplings,
follow the manufacturer’s recommendations or allow
1/32 to 1/16 inch clearance between the coupling
halves;
■ Do not drive couplings on hydraulic
pump or hydraulic motor shafts. They should be a
slip fit or shrunk on using hot hydraulic oil;
■ Always use a dry spray-on lubricant on splines
when installing. This prevents wear and adds to the
useful life of the splines;
■ When using
double universal joint couplings, the shafts must be
parallel and the yokes must be in line;
■
When installing V-belt pulleys on hydraulic pumps or
hydraulic motors, line up both pulleys as closely as
possible. Always install the pulleys with a minimum
amount of overhang as close to the hydraulic pump or
hydraulic motor face as possible. This increases
bearing surface life.
Routine
maintenance for hydraulic systems;
A little time and money invested in following the
six simple steps and routines below will pay you
dividends in the long run:
■ Maintain the
temperature and viscosity of hydraulic fluids within
their optimum limits. This means you need to know or
define the appropriate (minimum and maximum) fluid
operating temperature and viscosity ranges for the
ambient environment in which your hydraulic
equipment is operating and then select a hydraulic
fluid with a suitable viscosity grade and additives.
■ Keep your hydraulic fluid clean; contamination
is one of the most frequent causes of hydraulic
equipment failure or malfunction. Remember that air
is a contaminant too.
■ Maintain hydraulic
system settings according to manufacturers’
specifications and build this into your own
maintenance schedule as a minimum.
■ Follow
the correct commissioning procedures; don’t try and
cut corners or you could inadvertently damage
hydraulic components during their initial start-up,
even though this damage may not always be apparent
at the time.
■ Replace hydraulic components
before they fail and cause further problems
elsewhere in your hydraulic system.
■ If
things go wrong… conduct a full failure analysis,
making sure that you learn from your findings and
change your procedures accordingly. Don’t make the
same mistake twice, or again after that!
Troubleshooting common hydraulic problems;
STAY SAFE and before you approach the system make
sure all loads are lowered or mechanically secure.
DO NOT rely on a hydraulic control valve to hold a
load. Exhaust the pressure locked in the system and
isolate power supply systems and electrical
controls.
Touch - Heat is a real give-away,
the strongest indication of a problem in the system.
Feel different areas; if there’s discomfort when you
touch a component then there’s a problem. The
hottest component is faulty. In addition to damaging
seals and reducing the service life of the hydraulic
fluid, high fluid temperature can damage system
components through inadequate lubrication as a
result of excessive thinning of the oil film (low
viscosity). A fluid temperature alarm should be
installed in the system and all high temperature
indications investigated and rectified immediately.
Smell – An unpleasant, harsh or bitter smelling
oil is a sign of excessive heat and indicates that
the additive packages in the oil have broken down.
Remove and replace the oil as soon as possible to
avoid major damage to hydraulic components.
Look – Reduced performance, e.g. longer cycle times
or slow operation, is often an early indication of
problems within the hydraulic system. In a hydraulic
system, flow determines actuator speed and response
– a loss of speed therefore indicates a loss of
flow. Inconsistent, erratically moving actuators are
a strong sign of entrapped air – see our article on
article on Air Contamination in Hydraulic Systems.
Listen – Abnormal noise, banging or knocking, in
a hydraulic system is often caused by aeration or
cavitation – again, see our article on Air
Contamination in Hydraulic Systems. Cavitation
causes metal erosion, which damages hydraulic
components and contaminates the fluid. While
cavitation can occur just about anywhere within a
hydraulic circuit, air usually enters the hydraulic
system through the pump’s inlet. It is therefore
vital to make sure that the pump intake lines are in
good condition and all clamps and fittings are
tight.
Taking the time to proactively monitor
noise levels, fluid temperature and cycle times can
pay dividends – allowing you to detect changes and
conditions that can cause costly component failures
and unscheduled downtime of hydraulic equipment.
Air contamination in hydraulic systems;
Air in a hydraulic system is a common contaminant
and can be found in hydraulic fluid in four
different forms:
■Dissolved air – hydraulic
fluid typically contains 6-12% of dissolved air by
volume.
■Free air – for example a pocket of
air trapped anywhere within the system. Note that
pre-filling components and proper bleeding of the
hydraulic system during start-up will usually
eliminate free air.
■Foam – larger bodies of
air, typically bigger than 1mm in diameter, found
congregating at the top of the fluid. Note that
small amounts of foam are usually cosmetic and
generally do not cause problems.
■Entrained
air – very small bubbles of air, less than 1mm in
diameter, dispersed throughout the hydraulic fluid.
The last of these, entrained air, causes the
most problems and can lead to:
■Unacceptable
noise levels
■Reduced compressibility of the
hydraulic fluid creating poor, spongy component
response
■Reduced fluid viscosity, leaving
surfaces vulnerable to wear
■Increased
heat-load
■Reduced thermal conductivity
■Severe fluid degradation, leading to component
damage as a result of reduced lubricaton,
overheating and burning of seals.
■Cavitation
damage
■General decreased systems efficiency.
As well as the presence of foam, other symptoms
of air contamination are:
■Excessive or
Abnormal Noise – often caused by aeration or
cavitation in the hydraulic system. Aeration is
caused when air is introduced to hydraulic fluid and
noise is created when those fluids are compressed.
Cavitation occurs when the hydraulic fluid levels
run low and air makes its way into the system
instead.
■High Pressure – Often caused when
hoses and pipework have too small a diameter to
transfer fluids in high quantities, meaning that air
blockages inevitably occur. Draining the system and
fitting larger hoses can rectify the problem.
As mentioned above, hydraulic fluid contains up
to 12% dissolved air by volume. This dissolved air
can come out of the hydraulic fluid under certain
conditions resulting in entrained air. This process
is known as gaseous cavitation.
When fluid
temperature increases or static pressure decreases,
the air solubility is reduced and bubbles can form
within the fluid. A decrease in static pressure and
subsequent release of dissolved air can occur at the
pump inlet, because of:
■Clogged suction
strainers or inlet filters
■Undersized or
clogged reservoir breather
■Restricted intake
line
■Turbulence caused by intake line
isolation valves
■Poorly designed inlet
■Excessive vertical distance between the pump
intake and minimum fluid level
Other causes
of decreased static pressure can also be caused by
changes in fluid velocity through the system, flow
transients and incorrectly adjusted or faulty
anti-cavitation or load control valves.
Entrained air can also be caused by external
ingestion. Like gaseous cavitation, this often
occurs at the pump as a result of: loose intake-line
clamps or fittings, porous intake lines, low
reservoir fluid level or a faulty shaft seal on the
pump. It can also occur due to faulty or incorrectly
adjusted load control valves, which can result in
air being drawn past the gland of double-acting
cylinders, and return fluid plunging into the
reservoir (drop-pipes extending below minimum fluid
level should be fitted to all return penetrations).
As always, prevention is better than cure and
proactive hydraulic systems and equipment
maintenance will prevent the occurrence of most air
contamination problems.
Quiet
hydraulics;
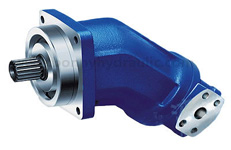
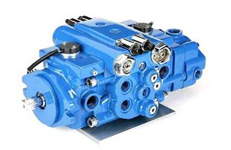
The hydraulic pump should be considered first. It
not only produces sound directly but generates
vibrations and fluid pulsations. These react with
other machine parts which produce more sound.
Hydraulic Pump Selection: Hydraulic pumps
generate more acoustic energy per unit of hydraulic
power by running at high speed rather than at low.
For this reason, a hydraulic pump should operate at
1200rpm whenever sound is critical. Below 3000 PSI,
the trade-off between pressure and hydraulic pump
size for a given drive power has little effect on
noise, so you are free to select any combination of
these factors that otherwise meet your needs.
Mechanical Isolation: To meet lower sound level
limits, the hydraulic pump should be mechanically
isolated from the rest of the machine or hydraulic
system using anti-vibration mountings. This also
requires that all connections to the hydraulic pump
is made with flexible hose. Flexible hose will often
reduce noise even where anti-vibration mountings are
not used. It prevents vibrations from reaching other
lines and hydraulic components to keep them from
becoming sound sources. In long lengths, this hose
is, itself, a good sound generator so only short
lengths should be used. For long runs, use solid
pipes with short hoses at the ends. All long lines
must be supported every meter or so, preferably with
clamps providing vibration damping. Lines must not
contact panels that are good sounding boards. Where
they pass through such panels, allow sufficient
clearance to prevent direct contact; never use
bulkhead fittings in such cases.
Acoustic
Isolation: The greatest sound level reductions are
attained with the hydraulic pump acoustically as
well as mechanically isolated. This requires that
the hydraulic pump be completely enclosed in a
non-porous shell weighing at least 10 kg per square
metre of surface. No openings can be tolerated and
all joints must be sealed with resilient gaskets or
moldings. Grommets of rubber or other soft material
should be used to close openings around piping and
to prevent mechanical contact between the enclosure
and piping. It must be emphasized that while
mechanical isolation by itself can reduce
noise,acoustic isolation can only be effective when
used in combination with mechanical isolation.
Fluids: The condition of the hydraulic fluid
being pumped is also important in controlling sound.
Fluid viscosity, temperature and vacuum by
themselves have no effect on sound levels. It is
important to control them, however, to prevent the
formation of entrained air or vapour bubbles that
can double sound levels and reduce pump life.
A combination of high fluid temperature and
inlet vacuum generates what are called cavitation
bubbles. However, at low temperatures, a high
viscosity fluid in a very long suction line can also
produce sufficient vacuum to cause cavitation.
Important methods of suppressing bubble formation
include: Using short runs or large diameter inlet
lines; keeping the reservoir elevation close to or
above that of the pump; using low pressure-drop
inlet filters that signal when they are producing
high vacuums and need changing; and, providing
adequate fluid controls. These are all good
hydraulic practices that become increasingly
important where you must achieve low sound levels.
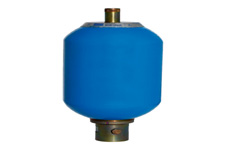
Reservoirs: Reservoirs provide the means for
releasing entrained bubbles. These can come from
sources other than the hydraulic pump inlet and are
usually present in the fluid returning to the
reservoir. It is important to note that low
reservoir temperatures reduce the rate of bubble
escape and may result in incomplete release. As
pointed out earlier, high temperatures promote
bubble formation. The best balance between these two
alternatives is achieved by maintaining the
temperature of oil leaving the reservoir in the
range of 120-150 degrees F and the temperature of
water-based fluids between 100-120 degrees F.
A simple reservoir has to be large to effect
complete bubble release. By providing baffles to
guide the fluid through a circuitous path and by
locating return and pump inlet lines as far apart as
possible, a reservoir holding between two to three
minutes of maximum pump flow can be adequate.
Hydraulic tubing dos and don’ts.
Don’t take heavy cuts on thin wall tubing with a
tubing cutter. Use light cuts to prevent deformation
of the tube end. If the tube end is out or round, a
greater possibility of a poor connection exists.
Ream tubing only for removal of burrs. DO NOT
over ream tubing as it can weaken the connection.
Do not allow chips to accumulate in the tubing.
They can be difficult to remove after bending
Follow the manufacturers recommendations on the
use of flaring tools. Don’t overtighten the feed
screw handle on a compression type flaring tool.
Improper use of a tool can cause washout and/or
splitting of the flare connection
Bend tubing
instead of cutting and using a fitting. This reduces
pressure drop and minimizes system losses. The
minimum radius of a tubing bend should be at least
three times the inside diameter of the tube. Larger
bends are preferred.
Sketch the optimum
tubing route before beginning the bending process.
Be sure to use tubing with the proper temper to
prevent wrinkles and flattened bends
Most
flares are made by hand or power tools that swage
the tube end over a split die. The standard flare
angle is 37 degrees from the centre-line. For best
results, heavy wall tubing should be cut, deburred,
and flared and bent using power equipment.